Picture
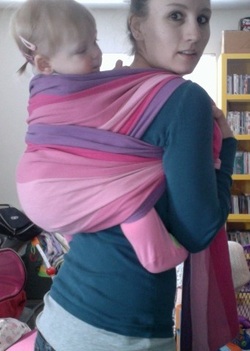
Our fourth Carry of the Week is the Reinforced Rear Rebozo Rucksack. This is a variation of the standard Ruck back carry we did for Carry #3. This back carry is a little bit trickier than a standard ruck, but after a couple tries, it gets easier!

The difference between the Pirate Carry and the Ruck is an extra pass that reinforces the carry and adds extra support under baby's bottom and around baby's back. 

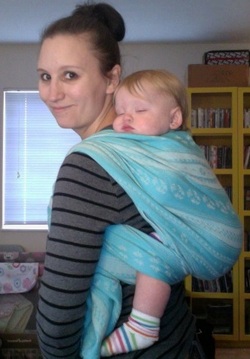
This carry can easily be done using a shorty wrap (size 2 or 3), but you can practice it with a longer wrap if that's all you have. We will add some variations over the next two weeks, some of which will help use up that extra tail you'll have hanging down if you use a longer wrap.

If you have never done a back carry with a wrap before, please start out with the basic version of this carry, the Ruck, which can be found here: http://weecarry.weebly.com/2/post/2013/01/carry-3-ruck.html

Also, remember that stretchy wraps are NOT ok to use for back carries. You should always use a woven wrap when wrapping baby up on your back.

Wee Carry Video Tutorials

Wee Carry Written Tutorial

Coming Soon!

Wee Carry Photo Tutorial

Coming Soon!

Pinterest Board - Carry of the Week #4: RRRR

RRRR Variations

Coming Soon!
 
Picture
Our third Carry of the Week is the Ruck. This is essentially the same thing as the Kangaroo Carry we did for Carry #2, only on your back. Ruck is the simplest and quickest back carry to do, so it's an excellent first back carry to learn.

Although it is a simple back carry, that doesn't mean it will always be easy for a first time wrapper. Back carries are very different from front carries as well, so even if you have mastered the Kangaroo Carry, the Ruck may still challenge you.

The best advice we can give to anyone new to back carries, or new to wrapping in general, is that practice makes perfect. If you don't get it the first few times, don't be discouraged. Back carries have a learning curve all their own. If you are nervous or tense, baby may sense this and fuss or squirm. The more comfortable you get with wrapping, the more comfortable your baby will get as well.

If this is your first time doing a back carry, our best advice is to make sure baby is fed, not sleepy, has a clean diaper, and is in a good mood. Trying to wrap an emotional baby is difficult even for the most talented wrappers. Also, try giving your baby a toy or a small snack (depending on age) to occupy him/her while you are learning. For safety reasons, newbies should also back wrap over a bed or couch, and in front of a mirror (or your reflection in the window, tv, etc) so that you can see what you are doing. Even using your computer or iPad's built-in camera as a mirror can help.


Wee Carry Video Tutorials

Wee Carry Written Tutorial

The Ruck carry starts with the middle marker in the center of your baby's back. Placing baby on your hip, hold the center of the wrap at baby's neck, and pull the fabric down and between baby's legs to make a seat. You may even want to tuck that fabric down into baby's pants to create a sturdier seat. Take the wrap tail that is behind your back and bring it over the shoulder opposite the side you are holding baby on.

Now, you will hip scoot baby onto your back, keeping the wrap over baby's shoulders and arms, and bouncing him/her up nice and high so he/she can see over your shoulder. It is important to maintain that seat you created in the beginning. Bring the second tail up over your other shoulder, keeping baby's arms and shoulders tucked in.

Next, tighten the top rail to keep baby's shoulders against your back. You may now hold the top rail in your teeth or under your chin. If your seat has come loose, or you chose the superman toss method of getting baby on your back, you will now make a seat. 

Pull the bottom rail of the wrap down nice and tight while still holding the top rail with your chin or teeth. Now, pull it up between you and baby, nice and high, reaching your arms under baby's legs and between your bodies to do so. Make sure the fabric goes from knee to knee, and gives a nice bottom lower than knees position.

Now grab the tails and bring them down under your arms, over baby's legs. Cross under baby's bottom, then pass under his/her legs and bring the tails to your front. Tie off in front, and you have just completed a ruck!

Wee Carry Photo Tutorial

Coming soon!

Pinterest Board - Carry of the Week #3: Ruck

Ruck Variations

Ruck Tied at Chest

Tandem - Ruck Tied Tibetan and FCC

Ruck Tied Tibetan

Ruck with Chest Belt (w/ a big kid!)

    Carry of the Week

    Every two weeks, Wee Carry will post a new Carry of the Week with videos and tutorials to help you along on your babywearing journey.

    Archives

    January 2013
    December 2012

    Categories

    All
    Babywearing
    Back Carry
    Carry Of The Week
    Cotw
    Front Wrap Cross Carry
    Fwcc
    Ruck
    Woven Wrap